Commercial Plumbers

Commercial Plumbers

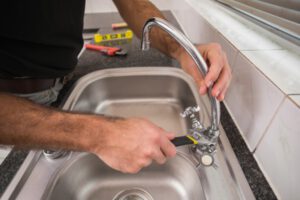
When a plumbing problem arises in your workplace, you need Plumbers Topeka KS to fix it. These professionals handle the installation, repair, and maintenance of water supply infrastructure in more significant buildings.

Plumbers

While all plumbers must comply with the same building codes, those who work on commercial properties must follow more stringent guidelines. Ask these five questions to find a qualified commercial plumber.

Clogged drains are a plumbing nuisance that can cause a lot of headache and inconvenience. If left unattended, a clogged drain or pipe can result in water and waste backups, which in turn can lead to costly property damage. Luckily, there are several ways to prevent and fix drain clogs.

The drain pipes in your home are interconnected, which means that if one pipe becomes clogged, it can affect the entire system. The best way to prevent drain clogs is to be careful what goes down the drains, such as not disposing of grease and fat in your sink or toilet, and keeping paper products out of the pipes (like tampons, wipes, and toilet paper). You can also try pouring hot water and baking soda down the drain to see if it dislodges the clog.

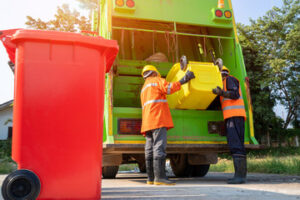
When it comes to clogged drain lines in commercial buildings, things can get a bit more complicated. Especially in hospitals and other medical facilities, the amount of people using the building’s bathroom and water systems can be much higher than in residential spaces. This means that it’s more likely for a drain line to become blocked or clogged by what people are flushing down the toilet.

In addition, commercial bathrooms often have multiple sinks, toilets, and bathtubs in the same space. This can make it more difficult to diagnose problems like a clogged drain or sewer line, as they could be caused by several different factors.

The good news is that, unlike at homes, commercial plumbers are equipped with more tools to deal with these types of issues. For instance, commercial plumbing companies can use power augers to clear blocked drains and pipes. These machines are similar to snakes, but they’re typically larger and more powerful, allowing them to break up and remove bigger obstructions in the pipes.

To use a power auger, simply plug it in and position it over the drain pipe. Then, feed several feet of the cable into the pipe and push it in. Once you feel resistance, switch the motor to reverse direction and pull out a few feet of cable. Repeat this process until the clog is fully cleared.

Sewer Line Cleanouts

If you notice sewage backing up into your drains, have toilets that keep clogging, or have other sewer-related issues, there is a good chance you have a problem with your lateral sewer line. This is the piping that connects your home to the municipal sewer lines or to your private septic tank.

If this line becomes clogged, it can cause sewage to back up into your drains, which is not only messy but also dangerous for your family. A plumber will often need to use a hydro-jet or sewer auger to clear the clog and restore proper function to your home’s plumbing system. This is why it’s so important to have a sewer line cleanout installed.

A sewer cleanout is a fitting located at the end of your lateral sewer line on your property. It has a cap that can be removed to allow plumbers to access the line to remove clogs or scope it for damage. Without a sewer line cleanout, a plumber would have to either climb on your roof or pull down a toilet in order to get to the lateral sewer line and clear a blockage.

While some newer homes have them, older homes do not. If your home does not have a cleanout, you can still have one installed. This will make it much easier and faster for a plumber to clear a clog or otherwise service your plumbing.

The location of your sewer cleanout will depend on how your house was built. If your septic system is connected to the municipal sewer lines, your cleanout will be close to the home in line with the septic tank. Otherwise, the cleanout will be located near your foundation wall. To find it, walk your yard and look for a plastic pipe that sticks up above ground.

The easiest way to know if you have a sewer cleanout is if you see the green marker on your lawn. However, if you cannot locate the marker, you can check inside your basement (the cleanout will be within 3 feet of your house’s inner foundation wall) or in crawl spaces and attics.

Water Heater Installations

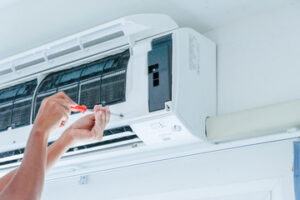
A commercial water heater is an essential part of any building, as it provides the hot water that’s needed for cleaning and cooking. If your water heater is not working properly, or you think it may be time to replace it, contact an experienced plumber to help. A professional plumber will be able to install or repair the water heater quickly and efficiently.

Water heaters are complicated appliances, and there are many factors that can affect their performance. A good plumber will be able to recommend the right type of water heater for your home or business, and they’ll also be up-to-date on any local regulations regarding water heater installations. This will ensure that your installation meets all safety and health requirements.

It’s important to have a well-functioning water heater, but it’s also vital not to overwork or damage it. An experienced plumber will know how to maintain your water heater so that it lasts longer and works more effectively. They can also help you choose a new water heater that will meet your needs and budget.

There are several things to consider when choosing a water heater, including how many people will be using it and the temperature of your hot water. The size of your home is another factor to consider, as you’ll need to ensure that the water heater can hold enough hot water for everyone to use. It’s also important to consider whether you’d like a conventional tank or a more modern tankless water heater.

If you’re considering a tankless water heater, it’s important to hire a licensed plumber for the job. A professional plumber will be able to ensure that the system is installed correctly, which will minimize leaks and reduce energy consumption. They will also be able to ensure that the system is connected properly to your plumbing, gas lines (if applicable), and ventilation systems.

It’s possible to install a water heater on your own, but it’s not a job for beginners. Not only are you dealing with hazardous materials such as gasoline (natural or propane, different rules apply), but you’re also working with high-level electricity. Even a small mistake can lead to flooding, electrocution, or carbon monoxide poisoning (depending on the fuel used).

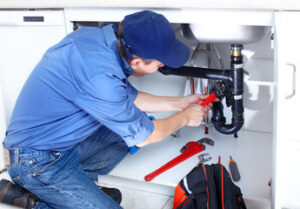
Emergency Plumbing Repairs

If you have a major plumbing issue, such as a sewage backup or a burst water pipe, then it’s time to call an emergency plumber. These plumbing professionals are available 24/7 to tackle all kinds of emergency plumbing repairs, including fixing toilets, garbage disposals, leaky faucets and water heaters. They can also thaw frozen pipes and conduct video inspections of sewer lines to diagnose problems.

The cost of emergency plumbing services will vary depending on the plumber and where you live. For example, a master plumber will typically charge more than a journey-level plumber. Master plumbers have advanced training and can perform more complex plumbing tasks, such as installing gas pipes or water heaters. They can also supervise junior plumbers and have the authority to pull permits and manage projects.

You should always ask for a written estimate before hiring an emergency plumber. This will help you determine whether or not the plumber is charging a fair rate. The plumber should be able to provide an estimated cost for both parts and labor. It’s also a good idea to check online reviews and testimonials before making a decision.

It’s important to know what kind of plumbing issues require emergency service and when it’s worth calling a plumber for routine work. For example, a slow drain that can be easily addressed with a drain snake probably doesn’t need to be fixed right away. A clogged toilet, on the other hand, needs to be addressed immediately before it causes flooding and serious water damage.

Some plumbing problems can wait until normal business hours to be fixed, such as a minor sewer clog that still allows for some drainage. But, other emergencies, such as a sewer backup that affects your entire home and puts you and your family at risk, should be addressed as soon as possible. By following these tips, you can make the best choice when it comes to choosing a plumber for emergency plumbing repairs. You’ll save money and be able to get your plumbing back up and running as quickly as possible.

How to Perform Faucet Repair

How to Perform Faucet Repair

The first step in faucet repair is to turn off the water supply. Next, remove the handle using a screwdriver. This will expose the cartridge, O-rings, washers, and a valve seat or stem.

Faucet Repair

These parts can be replaced, but it may be time to replace the entire faucet assembly if the originals are damaged or worn out. Visit Website for more information.

The handle of a faucet is the part that controls how much water flows through the system. If the handle is loose or broken, it can be easily replaced with a new one. This easy DIY project can be completed in a few minutes and doesn’t require a plumber. The first step is to gather the tools you will need. Having the proper tools will ensure the success of your repair and prevent any additional damage. You can find replacement handles at any hardware store or plumbing supply specialist. It is also a good idea to purchase any other parts you will need at this time as well.

Depending on the type of faucet, the handle may have a decorative cap or screw that covers the screw holding it in place. Use a screwdriver to gently pry this off and expose the screw underneath. Often these screws are labeled with the temperature indicator, “H” or red for hot and “C” or blue for cold. Once the cap is removed, loosen the screw using a Phillips-head screwdriver or Allen wrench. After the screw is loose, remove the handle and replace it with a new one. It is a good idea to add a non-permanent thread sealant compound on the screw to prevent it from coming loose in the future.

Before beginning the handle repair, shut off the water to your sink by turning the valves beneath the sink counterclockwise. This will prevent any accidental leaks or floods while you are working on the faucet.

Next, if the faucet is cartridge-style, locate the valves under the sink and shut them off. Then, unscrew the cartridge retaining nut by hand, or with the help of a pipe wrench or tongue-and-groove pliers. Once the nut is loose, the cartridge will usually lift straight up out of the faucet body. If the cartridge is leaking, you may need to replace it or simply tighten the nut. To determine whether the cartridge needs replacing, feel it for resistance or see if there are any obvious signs of wear or damage.

Seals

Faucet seals deteriorate from normal wear and tear, but sometimes they need to be replaced. A faucet with a ceramic-disk cartridge or a ball faucet with a cam and washer may have a cracked seal that needs replacing. If the faucet is a cartridge-type, it’s a good idea to order a replacement so that you have it in stock when it’s time to reassemble the unit.

Changing the seals is relatively easy for any do-it-yourselfer, but you need to know what type of faucet you have so that you can purchase the right parts. The brand name is usually inscribed on the body of the faucet and there are repair kits available that contain the proper replacement parts.

Turn off the water supply to the faucet before you start working on it. You should also plug the sink drain so that you don’t lose any small parts while you’re working. Once the water is off, you can proceed to remove the handle and dismantle the faucet.

Before you dismantle the faucet, make sure that the packing nut is tight. Loose packing nuts can cause leaks, but they’re easy to fix if you take the time to remove the cap and loosen it with an Allen wrench or screwdriver.

Next, you need to remove the handle to access the set screw, which is usually under the handle or in a decorative cover. You may need to pry this off with a flathead screwdriver and/or remove the decorative cap. Once you’re ready to dismantle the faucet, make sure to remove the retaining clip on the cartridge-type faucet so that it doesn’t fall into your hand as you work.

Once you have the cartridge removed, you’ll need to replace the neoprene seals that are on the base of the ceramic-disk cylinder. These are easy to find and can be purchased in a kit that contains all the necessary components, but you can also buy them individually if you prefer.

The valve seat might need to be replaced, as well. It might be pitted or scratched, which is common with hard water. If it’s pitted, you need to sand it smooth and apply some plumber’s grease before you place the new seat on the stem.

Cylinder

Cylinders can do amazing things, from lifting heavy objects to powering hydraulic systems. They’re important for keeping machines running smoothly, but they can also become damaged due to a wide range of factors. When these issues occur, they require careful and precise repair techniques to ensure optimal performance. A reputable repair shop can help you maintain your cylinders by following proper maintenance practices and using specialized tools to perform repairs.

Cylinder repairs can include a variety of different processes, including disassembly, cleaning, and resealing. They can also involve precision machining and welding, if needed. Some cylinders may even need to be replaced completely. In most cases, a professional will be able to diagnose the root cause of the problem and recommend the best course of action.

Before starting a cylinder repair, it’s always wise to clean the work area to prevent contaminants from getting into the cylinder unit. It’s also a good idea to make sure that all of the necessary tools are available before beginning the repair process. Using the wrong tools can lead to metal-to-metal contact and could damage the cylinder. It’s also a good idea not to use metal tools for seal replacement, as they might nick the seal or scratch the surface of the cylinder.

While disassembling a cylinder, it’s essential to inspect all of the components thoroughly after each step. Any defects that are noticed should be fixed immediately to avoid any problems down the line. This can save you a lot of time, effort, and money in the long run.

Once the cylinder is disassembled, it’s crucial to replace the piston and gland seals. It’s also a good idea for you to replace all of the O-rings. Doing this will minimize confusion and ensure that the seals are properly installed. Once the seals and o-rings are replaced, you can install the gland assembly and end cap, then secure the piston rod. Finally, you should lubricate the seals and inside of the cylinder tube with hydraulic oil.

Cylinders are extremely complex devices that can be easily damaged by a number of different issues. Luckily, a repair shop that specializes in hydraulic cylinders can help you keep your equipment in top condition by performing routine maintenance and replacing faulty parts.

Cartridge

Cartridges are mechanical devices, and like any mechanical device they can suffer from wear and tear. One common cartridge repair technique is stylus retipping, which involves replacing the old diamond stylus with a new one. This can improve performance on a worn out cartridge, or simply restore it to its original condition. Cartridges can also be completely rebuilt, with new suspension components and coils. In addition, many technicians offer upgrades to improve a cartridge’s performance.

A cartridge is a projectile that holds and propels a chemical mixture of primer, powder, and gunpowder. There are several types of cartridges, including centerfire and rimfire. A rimfire cartridge has its primer in a small nipple-like projection on the edge of the case base, whereas a centerfire cartridge’s primer is located in the case head.

In the past, there were also pistol cartridges with primers located in the case walls (cupfire), the case head (teat fire), or in a sideways projection on the base of the case head (pinfire). Today, only center and rimfire cartridges remain in mainstream usage.

As your retro video game cartridges get older they may begin to lose their ability to work, either they start showing garbled graphics on the screen or don’t boot at all. This is usually caused by the contact traces on the cartridge getting dirty and blocking the pins that connect to the cartridge slot in the console unit. A good cartridge cleaner is the best way to clean these contacts and prevent them from getting dirty again.

If you want to repair a cartridge yourself, you can find plenty of online tutorials and guides. However, it’s important to know that you should only try this if you’re an expert at cartridge repairs and have access to the right tools. Otherwise, you could damage your cartridge further, which might require professional intervention anyway.

A professional cartridge repair service can fix your cartridge and return it to you in excellent working condition. They have extensive experience with a wide variety of brands and can even upgrade your cartridge to mono use or switch its stylus. They can also repair the back damper, which is crucial to maintaining high compliance.

How Junk Removal Can Improve the Look and Function of Your Home

How Junk Removal Can Improve the Look and Function of Your Home

Whether you’re cleaning out your basement, moving to a new apartment, or simply sprucing up your yard, junk removal can be a great way to get rid of unwanted items.

Junk Removal

Junk Removal services can help you remove everything from furniture to garden debris and much more. They also can help you dispose of items that can’t be recycled or donated.

If you’re looking to get organized and declutter your home, junk removal can be an important part of the process. Not only does it help to keep your space tidy and clean, but it can also save you money in the long run.

First and foremost, you need to take a good look around your house and see what you’re accumulating. If you have a lot of items in your house that you don’t use, they could be cluttering up your life and making it difficult to find what you’re looking for.

Once you’ve identified what you need to get rid of, you can start the process. One tip is to set aside a specific area of your home where you’ll be focusing your efforts, such as your basement or attic. This will make it easier to keep track of everything you’re doing and ensure that you don’t forget anything in the process.

Another tip is to use storage bins and heavy trash bags to separate your smaller items from your larger ones. This will make it easier to throw away smaller things, and it can also make for a faster process all around.

In addition to the storage bins, consider creating a junk box by your front door for items you want to dispose of. Keeping this box in the front of your house will help you remember to do so on a regular basis and also allow you to recycle or donate the contents as needed.

You can even take a page out of the book of the 12-12-12 rule and try to get rid of one thing per day. Using this system will give you a sense of accomplishment and allow you to see your progress over time.

Finally, if you’re not quite ready to take the plunge and dispose of your unwanted items, consider selling them. There are a number of ways that you can sell your stuff, from hosting a garage sale to selling it online.

Junk removal is a necessary step for any organized home. It’s a great way to get rid of unwanted items that are taking up space in your home, and it can also be a great opportunity for you to clear out a room or two of clutter.

To make junk removal easier, it’s helpful to create a system that will help you organize your belongings. This can include using storage containers to similar group items together and labeling all of your items so that they are easy to find.

Another important way to get organized is by writing down a list of all your possessions. This can help you identify any items that you don’t use and decide whether or not they are worth keeping, donating, or selling.

Once you have a list, go through each room of your house and sort through your belongings. Start by sorting items into four different piles: keep, donate, sell, and trash. This will make it easier to get through your belongings quickly and efficiently.

In addition, it’s a good idea to ask family and friends for donations of items that you no longer use or want. This will help you clear out a room of clutter without having to deal with all the stress alone.

As you go through your belongings, it’s a good idea to consider how much they’re worth. You may be surprised at how much money you can get for some of your old items.

You might also want to try donating certain items to a charitable organization or garage sale. This will not only help you declutter your home, but it can also help the community in general.

Once you’ve sorted through your belongings, it’s time to put everything back into its proper place. This can include organizing your closets and drawers or adding new storage solutions to your home, like shelving units or hanging organizers.

When to Call an Emergency Electrician

When to Call an Emergency Electrician

If you need an emergency electrician, it is best to call a company that offers 24-hour service. Electrician West Hartford is equipped to handle all your electrical needs, from tripping circuit breakers to flickering lights. They can also help you learn more about carbon monoxide poisoning and help you avoid electrical fires in your home.

Electrician

If you are experiencing a buzzing or humming noise in your home, you need to investigate what is causing it. A loose connection or a malfunctioning circuit breaker can cause it. Here are some tips to help you pinpoint the source. One of the best ways to find the source of an electrical hum is to get a good condenser microphone. This should amplify the hum and show you where it is coming from.

Another option is to use a stethoscope to listen to the buzzing. You can also find the source using a rolled-up piece of paper. An electrical humming sound is not only annoying but can also be dangerous. If it persists, you should call an electrician to address the issue. They can replace or fix the wiring, which may be causing the hum.

If you are having trouble with flickering lights, contact an emergency electrician. While you might think that your lights are old and faulty, they could be a sign of a more serious issue.

During peak demand periods in your neighborhood, your electrical system may experience power surges. These voltage fluctuations can damage your electronics and even lead to fires. Fortunately, you can have the electrical panel and wires checked by an emergency electrician.

Flickering lights can be caused by many factors, including faulty light bulbs, electrical arcing, and a faulty lamp wire. However, you don’t always need an emergency electrician to fix your problem. Sometimes, just a simple bulb change can solve the issue.

It is important to note that flickering lights can also be a sign of a more serious electrical problem, such as a tripped circuit breaker or a faulty electrical panel. Having your lights flicker can be very uncomfortable, and you should not feel embarrassed to call an emergency electrician if you are experiencing this problem.

Circuit breakers are a vital element in your home’s electrical system. They protect your appliances and equipment from dangerous temperatures and sparks. A tripped circuit breaker is a very serious hazard. It can leave your whole house in the dark. Whenever your circuit breakers are tripping, it’s a good idea to call a licensed electrician.

When your circuit breaker starts to trip, it’s a sign that you have an overloaded circuit. An overloaded circuit is one where the amount of electricity that is flowing through the wires is greater than the circuit can handle. You should unplug all the devices on your circuit to fix the problem and wait a few minutes.

You need to wait because the arc that forms when two different voltages meet is very hot. This can cause a burning smell and damage the wires.

Symptoms of CO poisoning include headaches, dizziness, nausea, confusion, and weakness. People who are at risk of CO poisoning should keep a close eye on their gas appliances, especially gas ranges and water heaters.

When a home has a gas oven, hot water heater, or gas furnace, it’s important to have them checked by a qualified technician. This is because these appliances can deplete the air’s oxygen supply, causing CO buildup.

The best way to prevent CO poisoning is to keep fuel-burning appliances well-maintained and avoid using them indoors. But even if you do use them outdoors, be sure to have them inspected by a licensed technician at least once a year.

There are a variety of factors that can cause electrical fires, and preventing them is a top priority. The good news is, there are a few simple steps you can take to protect yourself from them.

First, check your wiring. Damaged or old cords can easily lead to an electrical fire. Also, consider purchasing a surge protector. This device will prevent your electronics from overheating.

Second, unplug anything you aren’t using. If you have space heaters, be sure to turn them off as soon as you are out of the room.

Finally, make sure you have a good smoke alarm system. Having working smoke detectors on each floor of your home will help you detect any electrical fire before it has a chance to start.

The Basics of Bathroom Plumbing

The Basics of Bathroom Plumbing

The first thing to check the Bathroom Plumbing is to inspect for leaks. A leaky pipe can result in a lot of water damage in a bathroom. It can also cause mold growth and structural damage. The leaks generally occur at the joints where the pipes meet. While tape and fillers may temporarily solve the problem, replacing the pipes will require a plumber’s help. Luckily, there are many ways to detect leaks and ensure they are not severe enough to cause damage.

Plumbing

A professional plumber can easily fix most plumbing problems in a bathroom. It is a simple task involving a few tools and the right knowledge. Generally, a clogged drain will be caused by soap scum, hair, or other debris. Plumbing can help you fix the problem and restore proper drainage. A skilled technician can also repair or install a new sink or fix an old one if it’s broken.

Bathroom plumbing consists of pipes in the walls and beneath the sink cabinet. The pipes feed hot and cold water to the sink, toilet and shower. Older homes may have used lead pipes. In recent years, zinc galvanized steel pipes have become more popular, making them easier to repair and replace. While the bathroom plumbing process can be complex, it is actually very simple once you know what it is made up of.

Bathroom plumbing systems also contain vents. Proper venting ensures that wastes and water are discharged properly. Without proper venting, wastes will collect and clog the pipes. Proper venting will prevent these blockages and ensure that the waste moves out of the bathroom plumbing system as efficiently as possible.

Once you have selected the location for your sink, the next step is to connect the hot and cold water lines. Make sure to align the drain line with the sink drain. If necessary, you can use an adhesive to secure the waste line. You should also level the tub. This is important for ensuring that the drain lines are properly connected. It is also a good idea to check for leaks in the bathroom plumbing system. This will help you to identify if you need to replace any damaged pipes.

The water supply in the bathroom is either from a well or a pipe attached to the city’s main line. The main water supply line usually runs in the basement or crawlspace. The pipes leading to the bathroom branch off the main line. The cold water pipes go directly to the bathroom fixtures while the hot water pipes go to the water heater. The wastewater will flow into the drain and treatment facilities. Depending on the type of water supply, the water supply will vary by location.

If you notice that the drain in the bathroom is clogged, you should call a plumber. Plumbing problems can happen for many reasons. Some of them are due to excess water pressure, corrosion, or broken seals. A plumber will be able to determine the problem and fix it as soon as possible. If the leak is not serious, you should not try to fix it yourself. You might end up with a bigger problem.

Bathroom plumbing systems include a drain, waste, and vent system. These systems are essential in the proper operation of a bathroom. The drain system is the source of waste in the bathroom and must be properly vented to the outside. The vent system provides air to the drainage system and helps keep the waste from clogging the plumbing lines. 

Typical bathroom plumbing systems are made of PVC or ABS piping. The drain system is connected to a main stack that starts in the basement and connects to the outgoing sewer line. Its top end runs through the roof. The bathroom plumbing system is important to have inspected by a plumber to avoid costly repairs. The inspection process can catch any petty problems before they turn into major problems.

How to Find a Good Air Conditioning Repair Service

How to Find a Good Air Conditioning Repair Service

If your air conditioning system is not working properly, you may want to consider hiring Heating And Air Conditioning Repair. Your air conditioner might stop working for several reasons, and you should investigate these problems as soon as you notice them. Ignoring minor problems can result in more serious issues down the road, and they can also take more time to resolve. Luckily, you can get help from a professional with simple tips. Listed below are some of the ways to hire an HVAC repair company.

air conditioning repair service

First, unplug the unit from the power source. If the thermostat is broken or improperly wired, it can prevent the air conditioning from working. If the thermostat is not working, try to unscrew the wire from the terminal. Once you have removed the wire, hold it by its insulation for two minutes. If you cannot remove the thermostat, it may be time to replace the entire system. Make sure you get all parts of the unit, including the wiring.

Next, check the temperature setting. If the thermostat is on, it means that cooling mode has been activated and your desired temperatures are set. If the temperature is off, however, the circuit breaker has tripped. To reset it, simply flip the switch off and on again. Hopefully, the issue will be solved! If your AC won’t cool, there are a few other things to check. If your thermostat is dead, the problem may lie with the condenser.

If you find the thermostat in the AC mode, it’s likely that a capacitor is malfunctioning. The thermostat will send a signal to the contactor coil of the condensing unit, and the coil closes the circuit. 240 volts flow through the condenser fan and compressor. If the fan still isn’t spinning, it’s time to call an HVAC repair professional to find the source of the problem.

Another common issue is a dirty evaporator. In some cases, this problem can be fixed by simply replacing the air filter. If the air filter is plugged, it will prevent air from absorbing heat, causing the coil temperature to drop. If the coil is frozen, simply wait for it to thaw. If the coil is not frozen, wait a few minutes until it thaws before calling an AC repair company.

The next step in getting your AC repaired is to schedule a tune-up or maintenance service. A tune-up and checkup is a great way to keep it running smoothly. If you have any problems, your AC repair technician can recommend a few repairs or even suggest ways to improve its performance. This will help keep your AC in top shape and save you money on expensive repairs. In addition, regular maintenance and inspections will help ensure your AC keeps working at its best.

Another step in air conditioning repair is replacing the capacitor. These capacitors store electricity in the system and release it to run the motors. The extra work makes them less efficient, and it reduces their life span. Replace them every three to five years. You’ll need an insulated screwdriver, a photo of the wires, and needle-nose pliers. Ensure you disconnect all wires and secure them before you begin to replace the capacitor.

While AC repair is an added service, maintenance is more important than ever. Maintenance is essential for preventing problems that reduce the AC’s performance and increase its lifespan. It can be performed by a professional and is much cheaper than an emergency repair service. The repairs are often more expensive than maintenance, but the process is quick. This is because the technician will be able to replace faulty parts on the same day they perform maintenance. If an AC repair company performs maintenance, you can avoid additional costs later on if the problem persists.

There are a number of DIY air conditioning repairs you can do at home. However, a professional may be needed if you don’t know anything about electrical wiring or HVAC repair. While it may not be as dangerous as a do-it-yourself repair, you must be sure to follow the manufacturer’s instructions and safety precautions to avoid harming yourself or damaging your air conditioning system. Even if you do have some experience with tools, it is still recommended to seek professional help to prevent any injuries.

Eco-Efficient Concrete Repair

Eco-Efficient Concrete Repair

Increasing concrete repair activities are associated with increased environmental and social impacts. These activities contribute to the depletion of natural resources, generate massive quantities of CO2 emissions, and create inert waste. These processes also negatively impact society, contributing to the noise, air, and water pollution. To avoid these negative effects, engineers must design eco-efficient concrete repair systems. The design of these systems should meet the requirements of both the construction and engineering communities. The following are some considerations to consider when selecting Concrete Repair mortar.

concrete repair

Before repairing cracks in concrete, prepare the area to be repaired by scrubbing it thoroughly. For larger cracks, you can use a sled and cold chisel. After removing the crumbling areas, sweep, vacuum, and hose down the surface to make sure there are no loose edges or debris. Next, apply the repair solution to the surface of the concrete and level it. This process will restore the concrete’s strength and look.

The objective of concrete crack repair is to stop water from flowing through it. Epoxy injection is a common method of structural bonding, but it requires a skilled contractor. Epoxy is injected under pressure into cracks and welds them into a monolithic structure. However, this method is not appropriate for active cracks. Urethane sealants, on the other hand, provide a watertight seal without forming a structural bond.

When using a concrete repair material, it is important to remember that it should be sized to match the minimum size of the damaged surface. The maximum aggregate size should be at least half of the minimum repair thickness. Otherwise, the repaired area will shrink and flake off. A dry surface will also ensure a quality finish. In addition to this, the repair material should not be pulled away from the substrate. Hence, the substrate should be as dry as possible.

The physical causes of concrete damage include chemical and biological factors. Chemical deterioration is a result of the leaching of the cement paste. Leaching cement paste from concrete increases its porosity, making it more susceptible to abrasion. Biological and mechanical factors such as microorganisms, overloading, and construction faults may also contribute to concrete damage. Luckily, there are many methods of concrete repair and you can find a company to help you.

To ensure a quality repair, you must first determine the cause of the damage. If it is caused by corrosion, an electrochemical technique can be used. Anodic corrosion inhibitors are conductive metal salts that inhibit the corrosive action of steel. The corrosion inhibitors in a concrete repair product reduce the corrosion rate of metal by inhibiting the release of electrons. Steel reinforcement in a concrete repair job will usually corrode more than in a newly repaired area.

Another way to spot concrete damage is to look for cracks and uneven surfaces. Cracks can affect the structural integrity of a home and become more noticeable over time. If you don’t repair these issues early on, they may worsen. Furthermore, concrete repairs are typically less expensive than replacement. Whether the cracks are small or large, a professional concrete repair company can assess the problem and provide a solution. It’s better to hire a concrete repair company early on than to put off the damage and pay the costs for a costly replacement.

Hairline cracks in concrete slabs are a common problem and do not signal the need for concrete repair. However, they can be a cosmetic concern, especially if they occur on the edges or at the top of the slab. For these cracks, you can choose a repair solution such as concrete sealing. AquaGuard offers free inspections and can even provide you with a reliable warranty. These concrete repair solutions will improve the structure’s strength and appearance. And they’ll preserve your curb appeal.