How to Perform Faucet Repair

How to Perform Faucet Repair

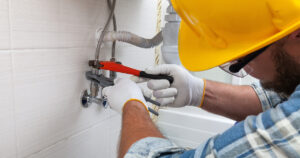
The first step in faucet repair is to turn off the water supply. Next, remove the handle using a screwdriver. This will expose the cartridge, O-rings, washers, and a valve seat or stem.

Faucet Repair

These parts can be replaced, but it may be time to replace the entire faucet assembly if the originals are damaged or worn out. Visit Website for more information.

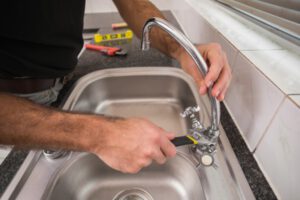
The handle of a faucet is the part that controls how much water flows through the system. If the handle is loose or broken, it can be easily replaced with a new one. This easy DIY project can be completed in a few minutes and doesn’t require a plumber. The first step is to gather the tools you will need. Having the proper tools will ensure the success of your repair and prevent any additional damage. You can find replacement handles at any hardware store or plumbing supply specialist. It is also a good idea to purchase any other parts you will need at this time as well.

Depending on the type of faucet, the handle may have a decorative cap or screw that covers the screw holding it in place. Use a screwdriver to gently pry this off and expose the screw underneath. Often these screws are labeled with the temperature indicator, “H” or red for hot and “C” or blue for cold. Once the cap is removed, loosen the screw using a Phillips-head screwdriver or Allen wrench. After the screw is loose, remove the handle and replace it with a new one. It is a good idea to add a non-permanent thread sealant compound on the screw to prevent it from coming loose in the future.

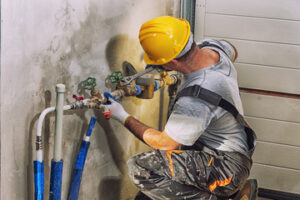
Before beginning the handle repair, shut off the water to your sink by turning the valves beneath the sink counterclockwise. This will prevent any accidental leaks or floods while you are working on the faucet.

Next, if the faucet is cartridge-style, locate the valves under the sink and shut them off. Then, unscrew the cartridge retaining nut by hand, or with the help of a pipe wrench or tongue-and-groove pliers. Once the nut is loose, the cartridge will usually lift straight up out of the faucet body. If the cartridge is leaking, you may need to replace it or simply tighten the nut. To determine whether the cartridge needs replacing, feel it for resistance or see if there are any obvious signs of wear or damage.

Seals

Faucet seals deteriorate from normal wear and tear, but sometimes they need to be replaced. A faucet with a ceramic-disk cartridge or a ball faucet with a cam and washer may have a cracked seal that needs replacing. If the faucet is a cartridge-type, it’s a good idea to order a replacement so that you have it in stock when it’s time to reassemble the unit.

Changing the seals is relatively easy for any do-it-yourselfer, but you need to know what type of faucet you have so that you can purchase the right parts. The brand name is usually inscribed on the body of the faucet and there are repair kits available that contain the proper replacement parts.

Turn off the water supply to the faucet before you start working on it. You should also plug the sink drain so that you don’t lose any small parts while you’re working. Once the water is off, you can proceed to remove the handle and dismantle the faucet.

Before you dismantle the faucet, make sure that the packing nut is tight. Loose packing nuts can cause leaks, but they’re easy to fix if you take the time to remove the cap and loosen it with an Allen wrench or screwdriver.

Next, you need to remove the handle to access the set screw, which is usually under the handle or in a decorative cover. You may need to pry this off with a flathead screwdriver and/or remove the decorative cap. Once you’re ready to dismantle the faucet, make sure to remove the retaining clip on the cartridge-type faucet so that it doesn’t fall into your hand as you work.

Once you have the cartridge removed, you’ll need to replace the neoprene seals that are on the base of the ceramic-disk cylinder. These are easy to find and can be purchased in a kit that contains all the necessary components, but you can also buy them individually if you prefer.

The valve seat might need to be replaced, as well. It might be pitted or scratched, which is common with hard water. If it’s pitted, you need to sand it smooth and apply some plumber’s grease before you place the new seat on the stem.

Cylinder

Cylinders can do amazing things, from lifting heavy objects to powering hydraulic systems. They’re important for keeping machines running smoothly, but they can also become damaged due to a wide range of factors. When these issues occur, they require careful and precise repair techniques to ensure optimal performance. A reputable repair shop can help you maintain your cylinders by following proper maintenance practices and using specialized tools to perform repairs.

Cylinder repairs can include a variety of different processes, including disassembly, cleaning, and resealing. They can also involve precision machining and welding, if needed. Some cylinders may even need to be replaced completely. In most cases, a professional will be able to diagnose the root cause of the problem and recommend the best course of action.

Before starting a cylinder repair, it’s always wise to clean the work area to prevent contaminants from getting into the cylinder unit. It’s also a good idea to make sure that all of the necessary tools are available before beginning the repair process. Using the wrong tools can lead to metal-to-metal contact and could damage the cylinder. It’s also a good idea not to use metal tools for seal replacement, as they might nick the seal or scratch the surface of the cylinder.

While disassembling a cylinder, it’s essential to inspect all of the components thoroughly after each step. Any defects that are noticed should be fixed immediately to avoid any problems down the line. This can save you a lot of time, effort, and money in the long run.

Once the cylinder is disassembled, it’s crucial to replace the piston and gland seals. It’s also a good idea for you to replace all of the O-rings. Doing this will minimize confusion and ensure that the seals are properly installed. Once the seals and o-rings are replaced, you can install the gland assembly and end cap, then secure the piston rod. Finally, you should lubricate the seals and inside of the cylinder tube with hydraulic oil.

Cylinders are extremely complex devices that can be easily damaged by a number of different issues. Luckily, a repair shop that specializes in hydraulic cylinders can help you keep your equipment in top condition by performing routine maintenance and replacing faulty parts.

Cartridge

Cartridges are mechanical devices, and like any mechanical device they can suffer from wear and tear. One common cartridge repair technique is stylus retipping, which involves replacing the old diamond stylus with a new one. This can improve performance on a worn out cartridge, or simply restore it to its original condition. Cartridges can also be completely rebuilt, with new suspension components and coils. In addition, many technicians offer upgrades to improve a cartridge’s performance.

A cartridge is a projectile that holds and propels a chemical mixture of primer, powder, and gunpowder. There are several types of cartridges, including centerfire and rimfire. A rimfire cartridge has its primer in a small nipple-like projection on the edge of the case base, whereas a centerfire cartridge’s primer is located in the case head.

In the past, there were also pistol cartridges with primers located in the case walls (cupfire), the case head (teat fire), or in a sideways projection on the base of the case head (pinfire). Today, only center and rimfire cartridges remain in mainstream usage.

As your retro video game cartridges get older they may begin to lose their ability to work, either they start showing garbled graphics on the screen or don’t boot at all. This is usually caused by the contact traces on the cartridge getting dirty and blocking the pins that connect to the cartridge slot in the console unit. A good cartridge cleaner is the best way to clean these contacts and prevent them from getting dirty again.

If you want to repair a cartridge yourself, you can find plenty of online tutorials and guides. However, it’s important to know that you should only try this if you’re an expert at cartridge repairs and have access to the right tools. Otherwise, you could damage your cartridge further, which might require professional intervention anyway.

A professional cartridge repair service can fix your cartridge and return it to you in excellent working condition. They have extensive experience with a wide variety of brands and can even upgrade your cartridge to mono use or switch its stylus. They can also repair the back damper, which is crucial to maintaining high compliance.

Easy Ways to Make a Leak Repair

Easy Ways to Make a Leak Repair

Every homeowner will experience a leaky pipe at some point, but this problem does not need to be expensive or disruptive to your home. Here are some easy ways at Plumbing Express, Inc. to make a temporary fix before the water damage gets worse.

leak

Detecting and fixing leaks can be costly, especially if they are located in hard-to-reach areas. According to the e-architect, these costs include detection and repairs and cleaning up the water damage.

Pipe clamps are a quick and simple way to repair a leaky pipe. They’re available in various sizes to fit different types of pipes and can be used on steel, cast iron, copper, and plastic pipes. They can also be used to fix cracked, split, or burst pipes. Pipe repair clamps are typically designed to provide a secure, long-lasting seal that’s resistant to corrosion and other factors that can damage the pipe.

The type of pipe repair clamp that’s best for a particular job will depend on the size and scope of the damage. Some clamps are designed to be a permanent solution, while others are intended as temporary fixes until the pipe can be properly repaired or replaced. It’s important to consider the exact conditions that will be encountered when choosing a pipe clamp, such as the pipe contents, the operating pressure, temperature, and pipe size. A structured risk assessment should be performed to determine whether the pipe will require structural restraint in the event of continued metal loss.

Before using a pipe repair clamp, it’s important to know the type of leak you’re dealing with. There are several different types of pipe leaks, including pinhole leaks, cracks, circular breaks, and burst pipes. It’s also important to know the diameter of your pipe, as different types of clamps are manufactured for a specific range of pipe sizes.

A good pipe repair clamp should be easy to install and use without the need for tools or soldering. It should also be able to handle the required operating conditions for your application. For example, if you need to clamp a pipe that’s exposed to the elements, you’ll want to choose a corrosion-resistant material like stainless steel.

When installing a pipe repair clamp, it’s critical to ensure that the clamp is securely fastened. If the clamp isn’t tightly closed, it can cause the pipe to lose its watertight seal. In addition, it’s important to only tighten the clamp as far as needed to secure it. Otherwise, the resulting tension can bend the pipe or break it.

Pipe repair sleeves

Pipe repair sleeves are a good option for fixing leaks in plumbing pipes. These sleeves are available at any hardware store and consist of a rubber gasket patch and a clamp that work together to tightly seal a damaged portion of plumbing. To install a pipe repair sleeve, cut the pipe down past the leaky section and clean the areas to be joined. Then, grease the surfaces that will come into contact with the sleeve’s gasket. Make sure that the sleeve is at least as long as the leaky section of pipe, or the seal may not be as tight.

These sleeves are made from a durable steel alloy and can be used in a variety of applications. They can be welded to the original pipeline, and they can also be placed on the line where a new piece of pipe needs to be added. They’re designed to be able to withstand high-pressure and low-temperature conditions.

Unlike a pipe clamp, these sleeves can be installed without a complete shutdown of the system. This makes them an effective solution for repairing leaks in a busy pipe section or one that crosses a roadway, rail line, bridge, or culvert. They’re also easy to install and provide a permanent solution for leaks.

There are several different types of pipe sleeves, including protective and insulating sleeves. Protective sleeves prevent damage from traffic or accidental impacts in high-traffic areas. Insulating sleeves keep the pipe at a certain temperature, protecting it from hot or cold materials.

If you suspect that your plumbing is leaking, it’s important to find the source of the leak as quickly as possible. Leaks can cause serious water damage and lead to expensive repairs. The easiest way to spot a leak is by noticing changes in your water’s taste or odor. If you notice a metallic or unpleasant flavor or odor, run the faucet for a few minutes to see if it disappears.

If you do notice a leak, it’s crucial to have a quick and easy leak repair solution on hand. Whether you need a pipe clamp, a repair sleeve, or something else, you can be sure that Total Piping Solutions has the product you need to get the job done right.

Pipe Tape

Using pipe tape is an easy way to seal a leaky joint. This type of tape is available at most hardware and home improvement stores and can be used to make a temporary repair while you wait for an emergency plumber. To use pipe tape, first locate the leaky joint and turn off the water. Then, unscrew the leaking joint and begin wrapping the tape around it. You should wrap it about four to six times to create a secure seal. Make sure that the tape goes in the direction you’ll be screwing the pipe back in and that you don’t overwrap it.

There are two types of pipe tape: plumbing thread tape and silicone tape. Plumber’s tape (also known as Teflon or PTFE tape) is used to create a seal between pipe threads and prevent leaks, while silicone tape can be used for hairline cracks that aren’t near pipe joints. Both types of tape work to lubricate the connections between joints, which makes it easier for them to be assembled or disassembled.

When using Teflon tape, it’s important to remember that the threads on pipes are typically threaded in a clockwise direction. This means that when you’re wrapping the tape, you need to start at the top of the threads and work your way down. It’s also a good idea to overlap each layer of the tape by half. This will ensure that there are no bare spots and that the tape is as thick as possible.

If you’re using silicone tape, it’s even simpler because you don’t need to disconnect the pipes. Instead, you can simply locate the leak and apply the tape to the affected area. This type of tape can be applied to all kinds of pipes, including copper, PVC plastic, steel, and malleable iron. It’s also water-resistant and can withstand high temperatures.

When applying silicone tape, it’s important to remember that it doesn’t stick to anything else. This means that if you apply it to a corroded or rusted pipe, it will only provide a temporary solution and could lead to further damage. To avoid this, it’s a good idea to apply the tape to clean, dry surfaces.

Pipe Putty

As a quick fix until a plumber arrives, pipe putty is an easy option for many homeowners. This type of epoxy putty works on copper and galvanized steel pipes and can be used to seal small leaks. It is important to remember that it is not a permanent solution, and the leak will likely return.

Before using putty on a pipe, turn off the water supply to the affected area. Clean the area around the leak and make sure that the leaking line is dry. Generally, you should use a wire brush or sand paper to remove any excess rust or loose scale. Ideally, the area should be free of oils, soaps, or greases, as these will interfere with adhesion to the pipe.

Once the area is clean, grab a pair of latex or nitrile gloves and pull out a tube of epoxy putty. You should be able to find this at most home improvement stores. Open the tube and cut off a section that is about the size of the area to be repaired. If you are working on a large hole in your pipe, then you may need to cut off more than one section of the putty.

After cutting off a piece of the epoxy putty, knead it with your hands to combine the two components. The putty should be uniform in color once it has been kneaded together. This process takes about a minute and can be a bit messy.

When you are ready to use the putty, apply it to the surface of your copper pipe where the leak is occurring. It is best to start at the source of the leak and work your way outward to the affected area.

Keep in mind that the epoxy putty needs time to set. This could take as little as a few minutes or as long as a couple of hours. Unlike some of the other solutions, pipe putty is not effective when there is still water flowing through the line.

If you have a live leak with water in it, then you will need to shut off the main water valve and then use tape or caulk to seal the area until the plumber can arrive. It is a good idea to have a plumber check the putty when it has set, just in case the repair wasn’t successful.

Plumbingleak detection, faucet repair, slab leaks, hydro jetting, water pipe repair

The Importance of Hiring a Plumber

The Importance of Hiring a Plumber

Plumbers install and repair pipes that supply water and gas to, as well as carry waste away from, homes and businesses. They also install plumbing fixtures such as bathtubs, sinks and toilets.

Plumber

A plumber’s job requires flexibility, physical strength, excellent motor skills and good vision. It also requires patience and perseverance. For professional assistance, you can contact your local plumbers.

Plumbing is a vital part of every livable home, office, or commercial building. It includes pipes and fixtures that distribute water to the different parts of the property and remove waste. It also includes drainage systems, which ensure that the water stays clean and safe.

The first step in putting up a plumbing system is to determine the size of the space. This entails taking measurements and identifying the route that all the pipelines will take, taking into account removal of drywall and other materials.

Once the plumber has established where all the connections will be, it’s time to install drains and vent pipes that allow the lines to enter and exit your house. Once these connections are in place, it’s time to set up the supply and waste connections for the main water line.

In this phase of the project, it’s important to install a water meter so that you can check your usage. This will help you identify leaks and spot problems before they escalate.

Another crucial aspect of a plumbing system is its pressure. Once the water enters the main line, it’s pumped under pressure along supply pipes made of plastic, copper or iron to the various taps and appliances in your home. A pressurized system keeps water from leaking down the pipe and around corners, which is a potential disaster for any homeowner.

Once all the components of your plumbing system are installed, it’s time to connect them to your sinks and other appliances. This is a messy job and will require the plumber to cut holes in your walls, ceilings or floors to fit all the pipes into place.

During this final phase of the project, the plumber will connect all your sinks, showers and toilets to your new plumbing system. They will also connect the hot and cold water lines for your dishwashers, washers, dryers and other appliances.

Once everything is connected and in place, the plumber will perform a quality assurance check to make sure that all the parts of the system are working properly. The plumber will inspect the pressure and look for any leaks. This is a critical part of a plumbing project and can lead to serious problems down the road if not addressed correctly.

A plumber is the guy in charge of your home’s water supply and drainage systems, and a well-trained professional can identify issues before they become big problems. A poorly installed or maintained plumbing system can result in leaks, flooding and even structural damage to the building, so it’s best to enlist a licensed professional when possible.

The main job of a plumber is to install, repair and maintain a variety of plumbing and piping systems and equipment. A jack of all trades, a maintenance plumber is often needed to keep your system running smooth, and the best ones have a reputation for being highly skilled, knowledgeable and friendly.

There are many things a plumber can do for your home, but one of the most useful is fixing up broken or failing fixtures. These can often be the source of water damage and mold growth, which can wreak havoc on your health and safety, your wallet and your home.

What Is Plumbing?

What Is Plumbing?

Plumbing Springdale AR is a system that brings clean water into your home and sends dirty water away. It consists of pipes, valves, plumbing fixtures, and tanks.

Plumbing

Whether you are a homeowner, remodeler, contractor, or handyman, you can use free plumbing diagrams to make sure your projects run smoothly. These diagrams can also help you avoid wasting time and money.

Plumbing is a system of pipes, fixtures, and vents that convey fluids for a variety of uses. Some of the most common are drinking water delivery, heating and cooling, waste junking, and special systems (oxygen, fuel gas, vacuum, nitrogen).

Pipes are usually made of metal or plastic and come in a wide range of sizes, shapes, and colors. They can be formed via casting or welding and may be joined using threading, soldering, brazing, compression fittings, or solvent welding.

Most pipes and tubing are made from copper or plastic. Both materials have their own unique properties, and each type can be more durable than the next.

Iron piping, sometimes known as cast iron piping, is a heavy-duty material that can last for decades. It can withstand high pressures, and it can be galvanized for extra durability.

PVC piping is another popular choice because it is relatively inexpensive and can’t corrode or rust. It also tends to clog less than other types of pipes.

Polyethylene piping, or PEX, is another durable option that can resist corrosion and is often used for water supply lines. This type of piping is easy to install and is available in a wide variety of shapes, sizes, and colors.

If you’re looking for a hard-working, long-lasting piping material, consider copper. It’s durable and lightweight, and it can be bent to fit tight spaces.

Other options for piping include stainless steel, which is a type of metal that can resist corrosion.  It can also endure chlorine disinfection and is less expensive than copper or plastic. Additionally, stainless steel has a higher resistance to heat than copper or plastic. It’s also easier to join than other piping materials, and it’s usually the preferred choice for residential plumbing.

Plumbing fixtures are components of a plumbing system that serve specific purposes and uses. They include faucets, sinks, showers, bathtubs, and toilets. In addition to their functional use, they also have aesthetic qualities that can help enhance the look of a space.

For example, faucets come in a variety of styles and finishes, which can set the tone for the rest of your design. Tubs and sinks can be found in different shapes and materials, too.

While a lot of people think of fixtures as merely functional, they can actually be quite glamorous and make your home feel more luxurious and comfortable. Fixtures are a significant part of any bathroom or kitchen remodel, and they can be one of the most important additions to consider when making decisions about your home.

Whether you are building your dream home or renovating an existing one, you will need to calculate how many plumbing fixtures you will need. This involves taking into account the size of each room and its surrounding area.

The amount of water that needs to be carried through the pipes and the number of fixtures that can share a vent are both important factors to consider. It is best to avoid placing too many fixtures in a single vent, as this can cause the water pressure to drop and create clogs.

The fixture schedule is a crucial tool for determining the size of your plumbing system and the type of pipes needed. It outlines the specifications required for every type of plumbing fixture and ensures that your entire plumbing system meets the standards of the code in which it was designed. The schedule can be updated with ease at any time during the project, either during planning or while construction is underway.

What Does a Plumber Do?

What Does a Plumber Do?

Plumbers In Georgetown KY specialize in the installation of potable water systems, drainage and sewage systems, and maintaining those systems. Plumbers can also work in the commercial and service, and repair sectors.

Plumber

A service and repair plumber has the skills to perform maintenance and repairs on both residential and commercial plumbing systems. They are often called to fix leaks, unclog drains and clean up grime. Some also offer 24-hour emergency services.

Most homeowners are familiar with the types of plumbers available. Some plumbers specialize in installing pipes and fixtures in residential homes, while others specialize in installing and servicing plumbing systems in commercial buildings.

Commercial plumbing involves more complicated systems that require special tools and training. The main responsibility of a commercial plumber is to install and maintain water, gas, sewer, and drainage systems in larger buildings. Licensed commercial plumbers are typically more knowledgeable about commercial plumbing issues.

Residential plumbers are experienced in handling problems with toilets, water supply systems, sewage systems, and drains in residential and two-story homes. Plumbers also install new pipe systems in new construction houses.

In addition to the common tasks of plumbing, service, and repair, plumbers are also trained to troubleshoot and repair water pressure issues. This includes repairing hose connections, fixing a leaky faucet, or adjusting a reduced pressure. These professionals have the technical expertise to diagnose and solve plumbing problems and are capable of using the latest tools.

Licensed plumbers must be licensed in their state to practice. They usually carry standard plumbing licenses. It is important to look for a plumbing company that is insured and that will provide you with 24-hour emergency services.

Plumbers are required to carry workers’ compensation insurance to protect you and your business. Before you hire a plumber, be sure to check to see if the company regularly performs repairs. Homeowners frequently request yearly and preemptive maintenance. Plumbing emergencies can cause mold and rot and can leave you in a difficult situation.

Despite all of the responsibilities, service, and repair, plumbers must be friendly, patient, and responsive. They must have the skills to diagnose and fix problems quickly. Also, they must be willing to work outside normal business hours. Lastly, plumbers must have a customer service background. If you are considering hiring a plumber, ask them to explain their service and repairs.

Commercial plumbers are professionals who install, maintain, and repair plumbing systems. They can work in homes, apartments, offices, and restaurants. Some jobs may involve bracing pipes and installing fire sprinklers. Others require a basic understanding of carpentry.

Plumbing systems in commercial buildings can be more complex than those found in residential settings. This is due to the number of floors, water lines, and drains. Often, there are several different types of toilets, sinks, and faucets in a single building.

Plumbers have to be knowledgeable about the latest and greatest technologies and equipment available in order to perform their job. A professional can identify potential problems before they become large problems. It is also important to know the state’s building code when dealing with plumbing in a commercial setting. Non-compliant plumbing can lead to expensive repairs and fines.

Commercial plumbers have to know the difference between a plumbing emergency and a regular plumbing maintenance schedule. If a leaking faucet is noticed, a plumber should be able to get the problem fixed.

In addition to a knowledge of the industry, a professional plumber should have a license. The right license can protect you and your business. Also, a company with insurance can cover your damages.

Aside from a great career, a professional plumber can save you time and money. Their skills can help your business avoid costly damage and keep your plumbing systems running smoothly. Having a plumbing service agreement can also help you spot small problems before they become major issues.

For a successful career as a commercial plumber, you must know the plumbing system in and out. Not only is this a big task, but it can be very dangerous if you don’t do it correctly. Ensure you hire the best plumber to do the job.

Getting a plumbing system checked on a regular basis can prevent a disaster. The right company can even provide you with a maintenance schedule. Ensure you make use of the latest technology when it comes to keeping your business’s plumbing system in tip-top shape.

If you have a large building with many floors, you will need a plumber who can get the job done. Commercial plumbers are trained to handle large-scale projects.